Tuesday, July 17, 2012

The Powder Room


...finally has a vanity!  

No more washing our hands in the kitchen sink. 

xo Meg

Friday, July 13, 2012

Master Bedroom

   We are in full scale renovation mode around here, in case you haven't been keeping up.  This means that everything in our house is covered by a layer of filth and there's seemingly no end in sight.

I've decided to make peace with living in squalor.

   So much so, that I will now be showing you yet another unfinished, nasty room in our house.  This room is also on the list for a spruce up.  And like every other fix up around here, there's a very limited budget but lots of willingness to work it hard.  Elbow grease is my best friend.

I took these pictures on my iphone and I'm gonna post them really small so I don't scare anyone away.


This is our master bedroom.  

Yeah, I know.  


It's actually a decent sized room.  Not as big as Audrey's room or anything, but decent.  She has a huge walk-in closet too.  We have a dinky little closet.  That we share. We were clearly drunk when we decided who would get which room (that drinking reference is for you, Elizabeth).

Once upon a time, I posted about our master bedroom and my dreams for it.  Here's the mood board I made then:


Things Our Master Bedroom Has Going For It:

  • size
  • nice light hardwood floors
  • 2 beautiful, large black and white photographs 
  • cool antique light fixture

  • Restoration Hardware Vintage Wash Linens for the bed (uh, not pictured in the room)

(these linens, in this colour)


Things To Address:

  • Window Coverings:  I am thinking of doing a DIY stencil on a pair of Home Depot Drop Cloths.  In my dreams, it would turn out something like these from Nicole Yee that I pinned last week.  Maybe not a black stencil.  Maybe something paisley-ish?


  • Headboard (for sure a DIY)
  • Come up with some plan for the room's layout .  That 'dresser wall' isn't cutting it.  I'd like to add a couple of chairs and a desk or side table over there. And remove the smaller dresser.
  • Paint the walls and ceiling
  • Sew a lumbar pillow for the bed
I want the palate to be pretty neutral/white with just a bit of the blues and greens that I love so much.  Here's some inspiration rooms:


style at home


kerrisdale design - probably my all time fave casual bedroom

So, add another project to our ever-growing list.  I won't be able to start in on this project until I complete a couple others going on around here.  But it's on the horizon.  I can almost see it!

Happy Friday!

xo Meg

Wednesday, July 11, 2012

Scavenging

Summer vacation officially began for my kids last week.  They are the type of kids who thrive on doing stuff - sports, hanging out with friends, going places and seeing things.  They like to be busy.

I, however, prefer to chill. But that's a whole other story.

You know the debate about over-scheduling your kids?  About how they need down time?  My kids are both very active in their sports and social lives and they don't ever seem to want down time. I worry that they are over-scheduled all the time.  However, I don't want them sitting around staring at a screen (computer, ipod, tv, etc) in their down time either.

It's week one of summer vacation and I'm already hearing the dreaded, "I'm bored, Mom!"


So when I found this fun pin on Pinterest, I thought we'd give it a try.

I basically used the same list, with a few additions.  You could do this in your own backyard but I sent my kids to the green just across the street from my house.  

Here's Audrey, showing me the stuff she found.

The prize for completing the scavenger hunt was a popsicle!


Overall, I'd say the Nature Scavenger Hunt was quite a success.  My kids really enjoyed it.  Maybe I'd put some trickier items on the list for them next time and have them pick up 5 pieces of garbage.  They did complete it much faster than I thought they would!

What are you doing to keep your kids busy and off the screens this summer?

xo Meg

Monday, July 9, 2012

Slow Progress Update!


We're at the point in the renovation process where I'm certain we'll never complete it.  
It feels a little like we're going to live in squalor for the rest of our lives.  

This week:


Drywall was installed in the kitchen.  Cabinets and doors should be in this coming week.


First coat done on the stairs.
From this angle, it looks pretty good.

This angle is a whole other story.

   The risers on the stairs are in really bad shape.  Our plan was for Jay to install a new board and trim piece onto the riser of each stair. I would then paint this part white.

But here's the problem with that.

   When you look down on the stairs, from the upstairs hallway, they look waaaay too dark.  The hardwood in this house is a very light colour, really just a clear coat on the oak.  So the dark grey stairs look really out of place.

See? This just looks silly!

Here's what we've decided to do to correct this problem.  We will still be painting the stair risers, spindles and trim in BM's White Dove.  But we will be adding this:

A Sisal Runner!  (via)


Doesn't it look pretty with the grey treads?  I think the warm colour of the sisal will really pull the hardwood and grey together.  And it will make the overall look less dark.

What do you think?

Tuesday, July 3, 2012

Lake House

We spent the weekend at the Lake.  My favourite place on Earth.  We were...

looking for lucky stones


driving the seadoo like a boss


getting even more freckles on our perfect little noses


kayaking through the lily pads


hitting the sandbar


Needless to say, no work was done on any of our renovations this weekend.  But we were so happy to spend the holiday weekend together in the sun and sand.  (It was the Canada Day weekend here)

Hope you had a wonderful weekend too.

xo Meg

Friday, June 29, 2012

Stairs Misery

Oh, you'd think I was a totally inexperienced DIYer regarding those stairs.  Here I was thinking it was gonna be a quick and dirty job.  All done by the end of the day today.

Ha!

I started yesterday morning with removing the rest of those stupid upholstery staples.  All seven zillion of them.  Then I sanded the stairs once with my palm sander and coarse sandpaper.  Messy, messy, messy.  Then I did the same thing with fine grit sandpaper.  More messy.  While I was at it I took the sander to the chipped trim on the staircase as well.  The whole thing needs a re-paint so I figured that while I was making a mess, I might as well.

After a shop-vac and a run at it with my Dyson, it looks like this:

top run of stairs

bottom run of stairs

All ready for priming and painting!  But it took me all day yesterday to complete the job.  Then I had to clean up the rest of my house since there was a fine layer of filth all over everything from the sanding.  I was super grumpy.  I like instant gratification.

Then I got my mail...

What have we here????  A present??? FOR ME???


It's a present for me!!!  I won a giveaway at My Best Friend Craig.  I can't wait to show you the gallery wall where I'm hanging it in Audrey's room.

Thank you for brightening my day Charmaine!

xo Meg

Wednesday, June 27, 2012

Stairway Update

This staircase is going to be the death of me.  I am certain.


See all those tiny bits of carpeting still stuck on the stairs?  Well, instead of using a tack strip, like normal carpet installers would, the old homeowners thought a quick upholstery stapler was the solution.  This is what my husband likes to call a 'JimmyJoe' job.  Terribly awful DIY skills were used by the previous homeowners in this house.  I could go on, but I won't.

Instead, I'll tell you about the four blisters on my hands.  I got them from removing all those staples from the oak treads and risers using a pair of needle nose pliers.  My hands were bleeding!   So much for that manicure...

Now that the staples have been removed, I am hard at work  sanding, prepping and painting my staircase.  Here are the colours we have chosen:


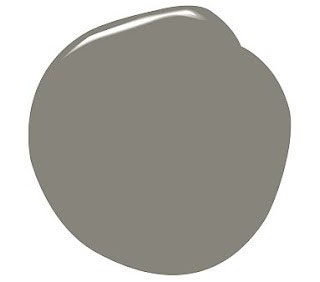
BM Chelsea Gray for the treads.

BM White Dove for the risers and trim.

Yes, this means I will be painting out the trim on the entire staircase.  It is looking rather horrible right now - chipped and dingy cream coloured paint.  This should be quite an improvement!  I will be back with more progress shots on Friday!

xo Meg